Organize Your Tools in Style and Functionality
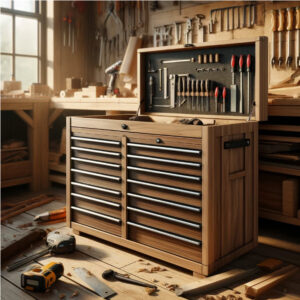
Tool Chest Plan. The image you sent depicts a blueprint for a traditional wooden tool chest with drawers and compartments. A well-organized tool chest is a valuable asset for any toolbox owner. It keeps your tools protected, secure, and readily accessible, saving you time and frustration when searching for the right tool for the job. This classic design offers ample storage space for various tools, making it a great option for both hobbyists and professional woodworkers.
Benefits of a Wooden Tool Chest
Organization:
A tool chest provides a designated spot for all your tools, keeping them organized and preventing them from getting lost or misplaced.
Protection:
A sturdy tool chest safeguards your tools from dust, dirt, and moisture, which can help prevent rust and corrosion.
Portability:
Many tool chests are designed to be portable, allowing you to transport your tools to and from your workspace easily.
Customization:
You can personalize your tool chest by painting or staining it according to your preference.
Key Features of the Tool Chest Plan in the Image
Traditional Design:
The blueprint features a classic tool chest design with a rectangular shape, a hinged lid, and multiple drawers.
Spacious Drawers:
The design incorporates several drawers of various sizes, providing ample storage space for various tools.
Compartment Tray (Optional):
The blueprint includes a compartment tray within the lid that can be used to store frequently used small tools or fasteners.
Hardware:
The tool chest is likely secured with hinges for the lid and drawer slides to allow smooth opening and closing of the drawers.
Materials List
Wood: Select a strong and durable type of wood, such as maple, oak, or walnut. The amount of wood will depend on the dimensions provided in the blueprint.
Plywood (Optional): Thin plywood can be used for the back panel and the compartment tray.
Hardware (hinges, drawer slides, screws, nails)
Drill
Saw
Tape measure
Sandpaper
Wood stain or paint (optional)
Steps to Building Your Tool Chest
Cut the Wood Pieces:
Use the dimensions provided in the blueprint to cut the wood pieces for the sides, top, bottom, drawers, compartment tray (if applicable), and back panel (if applicable).
Assemble the Tool Chest Body:
Secure the wood pieces together to form the body of the tool chest according to the blueprint using screws or nails.
Build the Drawers:
Assemble the drawers using the provided dimensions. Attach drawer slides to the sides of the tool chest and the drawers to allow for smooth opening and closing.
Attach the Lid:
Secure the lid to the back of the tool chest using hinges according to the blueprint.
Build the Compartment Tray (Optional):
If the blueprint includes a compartment tray, assemble it according to the instructions and secure it inside the lid.
Sand and Finish (Optional):
Sand any rough edges on the tool chest until smooth. You can personalize the tool chest by painting or staining it according to your preference. Apply a coat of sealant after painting or staining for added protection.
Additional Considerations
Size:
Consider the amount of tools you own and choose a tool chest with ample storage space to accommodate your needs.
Wood Type:
Hardwood is generally a more durable for a tool chest, but softwood can be a more affordable option, especially for beginner DIYers.
Casters (Optional):
You can add casters to the bottom of the tool chest for increased portability.
Safety:
Ensure all drawers close securely to prevent them from opening accidentally when transporting the tool chest.
Building a tool chest is a practical and rewarding DIY project that can improve your tool organization and create a functional and attractive piece for your workshop. By following the steps outlined above and considering these additional tips, you can construct a tool chest that will keep your tools safe and organized for years.