Why DIY Tool Storage Matters
DIY Tool Storage. Before we get into the nitty-gritty of tool storage plans, let’s discuss why having a good system is crucial. Trust me, once you experience the benefits of proper tool organization, you’ll wonder how you ever managed without it.

Efficiency and Productivity
I can’t stress enough how much time and frustration you’ll save with a well-organized tool storage system. Picture this: you’re in the middle of a project and need that specific wrench. In a disorganized workshop, you might spend precious minutes (or even hours) searching for it. But with a proper storage system, you’ll know exactly where to find it, allowing you to maintain your workflow and productivity.
Tool Longevity and Maintenance
Here’s something I learned the hard way: proper storage isn’t just about organization; it’s about protecting your investment. When tools are haphazardly tossed into a toolbox or left lying around, they’re more prone to damage. By creating dedicated storage spaces, you’re keeping your tools organized and extending their lifespan. Plus, when everything has its place, it’s easier to spot when a tool needs maintenance or replacement.
Assessing Your Tool Storage Needs
Before you start building or buying storage solutions, you must assess your current situation and the space you’re working with. This step will save you time and resources in the long run.
Inventory Your Tools
The first thing I always recommend is a complete inventory of your tools. This process might seem tedious, but trust me, it’s worth it. Here’s how I approach it:
-
- Gather all your tools in one place.
- Sort them by type (e.g., hand tools, power tools, measuring tools).
- Make a list or spreadsheet of everything you have.
- Note the size and frequency of use for each tool.
This inventory will be your roadmap for creating the perfect storage system. You might even discover some forgotten tools in the process!
Evaluate Your Workshop Space
Now that you know what you’re working with, it’s time to look at where you’ll be storing everything. When I first started organizing my workshop, I should have considered the full potential of my space. Look at more than the obvious areas; think vertically and consider unconventional spaces. Here are some questions to ask yourself:
-
- How much wall space do I have available?
- Can I utilize the ceiling for storage?
- Are there any awkward corners or spaces that could be repurposed?
- Do I need mobile storage options?
Remember, the goal is to maximize every inch of your workshop while keeping frequently used tools easily accessible.
Popular DIY Tool Storage Solutions
Now that we’ve laid the groundwork, let’s explore some popular DIY tool storage solutions. I’ve tried most of these in my workshop, and each has unique advantages.
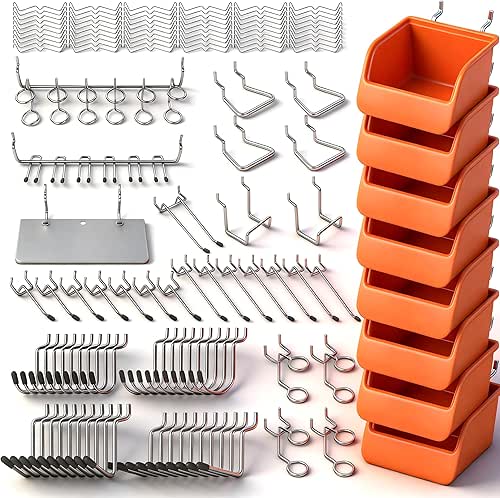
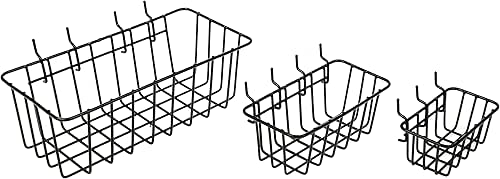
Pegboard Systems
Pegboard is a classic for a reason. It’s versatile, affordable, and easy to customize. I love pegboard because it lets you visualize all your tools at once, making it easy to grab what you need quickly.
Customizable Pegboard Layouts
One of the best things about pegboard is how easy it is to rearrange. I recommend starting with a basic layout and then adjusting as you use your tools. You’ll quickly figure out which arrangement works best for your workflow. Pro tip: use different colored hooks or paint sections of your pegboard to create zones for different types of tools.
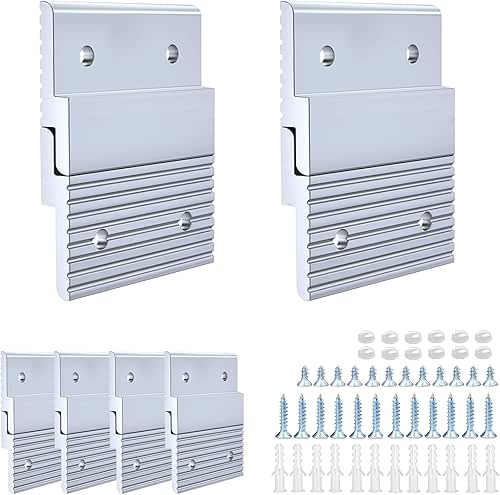
French Cleat Wall
The French cleat system is a game-changer for tool storage. It consists of a series of angled wood strips attached to your wall, supporting various storage containers and shelves.
Versatility of French Cleat Systems
What I love about French cleats is their flexibility. You can easily add, remove, or rearrange storage components without drilling new holes in your wall. It’s perfect for those who like to optimize our workspace continually.
Rolling Tool Cart
A rolling tool cart is a fantastic solution for those with limited space or who need to move their tools around. I built one for my smaller tools and frequently used items, and it’s been a real workspace saver.
Wall-Mounted Tool Cabinets
Wall-mounted cabinets are great for keeping your tools dust-free and out of sight. They’re handy for storing power tools or items you don’t use daily. Plus, building your cabinet allows you to customize it to your specific needs.
Step-by-Step Guide: Building a DIY Tool Cabinet
Speaking of wall-mounted cabinets, let’s walk through the process of building one. This project is a great way to create custom storage tailored to your tools and space.
Materials and Tools Needed
For this project, you’ll need:
-
- Plywood (3/4 inch thick)
- Wood screws
- Hinges
- Door handles
- Wood glue
- Paint or wood stain
- Sandpaper
- Circular saw or table saw
- Drill
- Measuring tape
- Level
- Safety equipment (goggles, dust mask)
Designing Your Cabinet
Before cutting any wood, sketch out your design. Consider the size of your tools and how you want to organize them. I like to use graph paper to create a scaled drawing. Remember to plan for adjustable shelves to maximize flexibility.
Construction Process
-
- Cut the plywood to size for the cabinet box, shelves, and doors.
- Assemble the cabinet box using wood glue and screws.
- Install shelf supports or dados for adjustable shelves.
- Attach the back panel to add stability.
- Build and attach the doors using hinges.
- Sand all surfaces and apply your chosen finish.
Finishing Touches
Once the main construction is complete, it’s time for the fun part – customizing your cabinet. Consider adding:
-
- Magnetic strips for small metal tools
- Hooks for hanging items
- A pegboard insert for one door
- Labels or a tool shadow board
Remember, the goal is to create a storage solution that works for you. Don’t be afraid to get creative!
Maximizing Vertical Space
In many workshops, floor space is at a premium. That’s why I’m a big advocate for making the most of vertical space.
Ceiling Storage Solutions
Take notice of your ceiling as valuable storage real estate. I’ve installed overhead racks for storing long items like pipes and lumber. You can also use pulley systems for items you don’t need to access frequently.
Utilizing Door Space
Workshop doors are often underutilized. Consider adding over-the-door organizers or mounting shallow shelves to the back of your door. These are perfect for storing spray cans, small hand tools, or safety equipment.
Organizing Small Tools and Hardware
Small tools and hardware can be the most challenging part of keeping organized. Here are a couple of solutions I’ve found effective:
DIY Drawer Organizers
Custom drawer organizers are a great weekend project. Use thin plywood or even sturdy cardboard to create dividers tailored to your specific items. I like to make mine adjustable so I can reconfigure as my needs change.
Magnetic Tool Holders
Magnetic strips or bars are fantastic for keeping metal tools organized and easily accessible. I’ve mounted these above my workbench for frequently used items like screwdrivers and pliers.
Maintenance and Updating Your Tool Storage
Creating an organized tool storage system is just the beginning. Maintaining and updating your storage regularly is important to keep your workshop running smoothly. Here are a few tips I’ve learned:
- Regular Clean-up: Set aside time each week to return tools to their proper places.
- Periodic Review: Reassess your storage needs every few months. Are there tools you’re not using? Are there new ones that need a home?
- Adapt and Improve: Be bold and modify your storage solutions as you learn what works best for you.
- Label Everything: Clear labeling will save you time and frustration in the long run.
Remember, an effective tool storage system evolves with your needs and working style. Stay flexible and open to improvements.
Conclusion
Creating DIY tool storage plans is more than just a practical solution; it’s a way to personalize your workspace and improve your crafting experience. From pegboards to custom cabinets, there’s a storage solution for every tool and every space. The key is understanding your needs clearly and letting your creativity flow. As you embark on your tool storage journey, remember that organization is an ongoing process. Don’t be discouraged if your first attempt isn’t perfect – each iteration will bring you closer to your ideal workshop setup. The time and effort you invest in organizing your tools will increase efficiency, reduced frustration, and more enjoyable DIY projects. So, grab your measuring tape, fire up your imagination, and start planning your ultimate tool storage solution. Your future self (and your tools) will thank you!
FAQs
How often should I reorganize my tool storage?
Do a quick reorganization monthly and a more thorough review every 3-6 months or whenever your tool collection significantly changes.
What’s the best way to store power tools?
For power tools, I prefer using wall-mounted cabinets or dedicated shelving units. If possible, always store them in their cases, and consider using a dehumidifier in your storage area to prevent rust.
Can I create an effective tool storage system on a budget?
Absolutely! Many effective storage solutions, like pegboards and DIY shelving, can be created with minimal investment. Start small and upgrade as you go.
How do I prevent tools from rusting in storage?
To prevent rust, ensure your storage area is dry, use silica gel packets in toolboxes, and consider applying a light coat of machine oil to metal tools before storing them for long periods.
What’s the best way to store long items like levels and saw tracks?
Vertical storage works best for long items. You can create a simple rack with PVC pipes or use a French cleat system with custom holders for each item. DIY Tool Storage.